Thursday, 25 March 2010

Easter Chick Pots

For this you will need:

  • yogurt or similar pot
  • tissue paper
  • glue
  • scissors
  • googly eyes
  • heart shape sequin or sticker
  • feathers
  • shredded paper
  • mini eggs or small gift

P1160091

  • Cut the tissue paper into small squares and cover the yogurt pot with the tissue paper
  • Next glue on the googly eyes, heart shape beak and the feathers
  • Put shredded paper inside the pot and fill with Easter treats

P1160090

  • Variation: you could do also make a rabbit. Swap the tissue paper for cotton wool and add card rabbit ears to the back of the pot and glue feathers to the rabbit ears.

Thursday, 16 April 2009

Bird Nest Paper Plate Craft

For this you will need:

P1130097

  • Paper plate
  • Felt
  • Glue
  • Paint (not shown)
  • Feathers
  • Hay
  • Wool
  • Scissors
  • Brush

To make:

  • Cut a bird shape out of a piece of fabric or felt

P1130098

  • Paint the top half of a paper plate to look like sky and glue on the felt bird

P1130099

  • Then apply lots of glue to the bottom half of the plate and add your nest materials. Hay, wool, feathers or something else you may have collected, perhaps seeds or grass
  • Cut some egg shapes from the felt and glue into the nest.

P1130100

Monday, 30 March 2009

Easter Egg Card

For this you will need:

  • 1 apertutre card or plain card

  • Ruler
  • Polystrene oval shape (avaible to buy from here)

  • Decorations, jewels, paper, stickers

  • Felt tips

  • Glue

  • Scissors

To make:

  • Take one aperture card or make your own by cutting a square from the centre of a folded piece of card (grown up bit)

  • Colour the oval shape using felt tip pens and decorate with jewels, glitter or stickers


  • Decorate the front of the card

  • Glue the egg shape to inside the card positioned so the egg appears through the window


Finished Easter Egg Card....just add a message!!

Wednesday, 18 March 2009

Mothers Day / Easter Basket

To make this basket you will need:

  • Scissors

  • Ruler

  • A4 thin card in assorted colours

  • glue

  • shredded paper

  • stapler


  • To make the basket:
  • Take one sheet of card and every 3cm along the width cut to half way down the depth. Do this for the entire width of the card.


  • Along the opposite length of the card cut little slits about 1cm apart all the way along the bottom of the card, these will enable the bottom of the basket to be attached.

  • Next wrap the card round into a cylinder shape and staple once at the bottom to secure and once half way up the cylinder.


  • Once you have created the basket shape, next pull down all the flaps except two opposing flaps and pull these up and staple to make a handle.


  • To make a bottom for the basket cut a card circle 8cm in diameter, fold up all the little slits and sellotape the bottom in place.


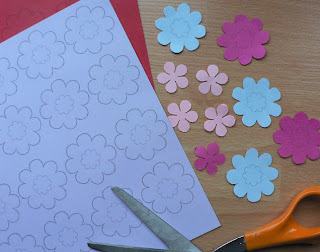
  • Next cut out flower shapes, to decorate the ends of the flaps. Click here for the pattern or make your own.


  • Glue the flower shapes to the ends of the flaps and across the handle.

  • Add stredded paper into the basket along with a gift. It could be mini easter eggs, chocolates or soap.

Wednesday, 25 February 2009

Spoon Monsters

To make you will need:
  • 1 Wooden spoon
  • Paint
  • Glue
  • Foam eyes, nose and mouth. You could cut these out of paper or felt also.
  • Double-sided sticky tape
  • Sellotape
  • Coloured paper
  • Pipe cleaners or wool

  • To make:


  • Paint the spoon


  • Glue the mouth, nose and eyes to the monster, we used foam ones but you could make your own from coloured paper.


  • Cut a stripe of coloured paper and fold into a concerntina.


  • Glue hands to the ends and sellotape the arms to the monster. If you tape round the back then the tape can't be seen.


  • Do the same for the feet.
  • Decorate the paper using the paint. We did spots, but you can choose any decoration.
  • Twist a pipe cleaner for the hair and attach to the spoon using double-sided sticky tape. If you have young children you could use wool instead.

Make the monsters as colourful as possible. Maybe give you monster extra legs, arms or add extra eyes.

Friday, 23 January 2009

Patchwork Elephant Using a Milk Carton

For this you will need:


  • Tissue paper in assorted colours
  • 1 Large plastic milk carton with a handle
  • Glue and paint brush
  • Scissors
  • Eyes (not shown) can be googly or cut out of paper

To make :

  • Wash out the milk carton, throw away the lid and cut off the top just following a line around the bottom of the handle. Discard the bottom of the milk carton.
  • Cut out large squares of tissue paper in a variety of colours


  • Glue the squares to the milk carton in a patchwork style
  • Add a couple of eyes either side

Finished Patchwork Elephant by Shelley aged 4

Thursday, 18 December 2008

Christmas Pudding Christmas Card


For this you will need:
  • 1 piece of white A4 card
  • 1 piece of brown paper
  • 1 small piece of green card
  • 1 small red circle
  • glitter
  • white paint
  • black paint
  • glue
  • scissors
  • silver pen
  • paint brush

To make:

  • Fold the white card in half and put to one side

  • Cut a large circle out of the brown paper using the cribkle scissors if you have them.
  • Add some PVA glue to the white paint, approx 50/50 and paint the cream on top of the pudding.

  • Sprinkle the cream with glitter


  • Paint black spots for the fruit in the pudding

  • Cut a holly shape from the green card and glue to the top of the pudding

  • Glue the red circle on top of the holly for the berry

  • Write your message onto the card with the silver pen

  • Glue the finished pudding to the card


Christmas Card by Evan Aged 6

Write your message and send.

Monday, 13 October 2008

Frog Puppet


To make this you will need:


  • Two paper plates

  • Paint colours

  • White paper

  • Coloured card

  • Stickers to decorate

  • Glue

  • Black pen

  • Paint Brushes

  • Sellotape

  • Scissors

To make:

  • First cut one paper plate in half and fold the other in half to create a crease

  • Paint the whole plate a mouth colour such as pink or red

  • Paint the two halves of the plate a body colour


  • Put both plates aside to dry

  • Draw two circles onto the white paper for eyes and cut them out

  • Cut out two large eye socket shapes out of coloured card, then glue the eyes onto them


  • Put two folds at the base of the eye sockets

  • Cut a tongue shape out of the coloured card

  • Once the paint is dry, sellotape the tongue to the inside of the frog mouth

  • Using PVA glue, glue the two half plates to the full plate keeping wrong sides together

  • Allow to dry

  • Sellotape the two eyes to the cut edge of the half plate

  • Decorate with stickers


Finished Frog!!

Friday, 26 September 2008

Parrot Collage with Feathers

To make this you will need:
  • feathers available from craft shops

  • A4 paper white or coloured

  • shiny paper cut into feather shapes

  • black pen or printer

  • glue

  • brown Crayon or pencil

  • To make:

    • First draw a parrot shape onto the A4 paper


    • Then decorate the parrot with the feathers and glue

    • Colour in the beak and branch

    Sunday, 7 September 2008

    A is for Apple Collage

    To make this you will need:
  • Red paper - tissue paper, magazine cuttings, sweet wrappers, card, any scraps of paper
  • Green felt tip or pencil
  • Outline drawing of an apple. Click here for pattern.
  • Glue
  • Scissors

  • To make:

    • Cut or tear the paper into small random pieces
    • Glue them inside the apple outline
    • Colour the stalk and leaves green

    Finished!! Mmmmmm.

    Alternative: You could try other fruits, just change the colour of paper. Try b is for....banana, p is for.....pear, or o is for........orange.

    Thursday, 3 July 2008

    Postcard Collage


    To make this you will need:
    • A5 Paper or card
    • Holiday inspired pictures
    • Scissors
    • Glue stick
    • Coloured pencils or pens
    To make:

    • Print or draw the postcard design on one side
    • Cut out some holiday inspired pictures either printed from the computer or from catalogues and magazines.
    • Draw the sun, sea and beach on to the blank side of the card.
    • Glue the pictures on top of the drawing
    • Write a message on the other side of the postcard.

    Alternative - you could draw trees and fields and stick pictures of a tent and camping equipment or find pictures of landmarks and sights from a holiday brochure.


    Finished postcard by Evan - aged 6

    Thursday, 19 June 2008

    Seaside Collage


    To make you will need:
    • Paint
    • Sand
    • Brushes
    • Seashore inspired sponges (see here)
    • Picture of a sunshine or a yellow paper circle
    • Glue
    • A3 sugar paper
    • Shiny paper (optional)
    • Pots for mixing
    • Plate

    To make:

    • Mix the some of the yellow paint with sand in a seperate pot or cup and paint on one half of the A3 paper.
    • Cut some wavy stripes of paper from some blue sugar paper or shiny paper and glue onto the top half of the paper.
    • In the top corner glue on your sun.
    • Next pour some of the paint onto the plate and dip the sponges in making sure you get a good covering and press onto your picture.
    • Decorate the sponge shapes with glitter glue

    Finished!!

    Alternatively if you didn't want to buy the sponges you could draw your sea creature shapes.

    Monday, 19 May 2008

    Peg Dolls

    To make you will need:
    • Peg
    • Card
    • Glue
    • Scissors
    • Pencils
    • Double sided sticky tape
    • Wool
    • Fabric

    To make:

    • Draw a boy or girl shape onto a piece of card and cut out.
    • If making a boy draw a jumper and trousers shape onto the fabric and cut out.
    • If making a girl draw a dress shape onto the fabric and cut out.


    • Decorate with flowers, or ribbon
    • Cut out a few lengths of wool for hair and glue it onto the doll.
    • Glue the hair to the dolls.
    • Draw a face onto the doll and colour in the feet.
    • Using the double sided sticky tape stick the doll to the peg.
    • Use your doll to decorate a curtain,

    or a plant pot.

    Thursday, 24 April 2008

    Space Collage


    To make you will need:
    • black paper
    • glitter pens
    • coloured paper
    • shiny paper
    • scissors
    • printer
    • glue

    To make:

    • Print out some planet, rocket or alien shapes out onto the coloured paper. Cut them out. We found our printables here
    • Cut out some stars from the shiny paper.


    • Glue the planets, aliens and space ships onto the black paper.
    • Decorate with the glitter pens.
    • Leave to dry.

    You could also use sticker stars to decorate.


    Finished by Evan - Aged 5